How to Properly Install and Maintain Toyota Steering Arm Knuckle Studs
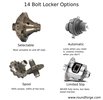
- 5 Ways to Upgrade Toyota Knuckle Studs
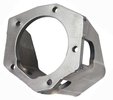
- Factory Toyota Knuckle Studs
- Front Range Off Road (FROR) ARP Knuckle Studs
- Trail-Gear Super Metal Knuckle Studs
- Trail-Gear Magnum ARP Knuckle Studs
- High strength red Loctite - If you have Longfields, RCVs, or other chromo axles and you don't expect to break an axle, you can go with red. If you spend a lot of time on the street and wheel very moderate trails, you can go with red.
- Medium strength blue Loctite - If you expect to break axles a lot (maybe you even run stock Toyota Birfields) using the blue will make it easier to get your Birfield apart.
- Anti-seize - Anti-seize is the most amenable to retorquing on a frequent basis, but it will come loose more quickly than a threadlocker. Only use this if you're going to retorque your studs every day of a trail ride.
- Remove the steering and the steering arm studs from the knuckle completely. This is a good time to grease the knuckle bearings and check preload.
- Once you’re done with that, clean the studs, nuts, cone washers, knuckle threads, and steering arms until there is no trace of grease or oil. You also particularly don’t want any paint on the knuckle/steering arm contact surfaces, cone washers, or in the steering arms’ tapered holes.
- Still dirty? Keep cleaning....
- Wait for everything to dry. Make sure everything is really dry....
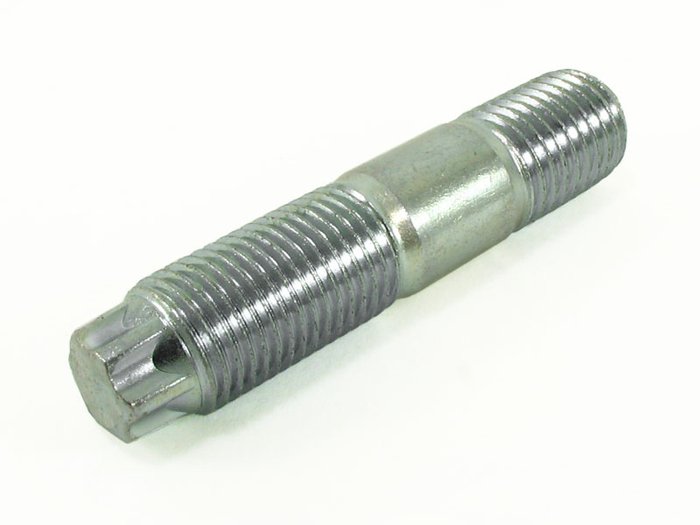
- Double nut the studs (or get your E12 Torx socket if you have factory Toyota studs, or an 8mm socket for Trail-Gear studs).
- Coat the knuckle-side threads with red Loctite, and spin them down into the knuckle until they are snug (No need to go crazy here). We recommend 20 ft-lbs of torque max, but you can just get them comfortably tight.
- Remove your double nuts if you used them.
- Install steering arm, cone washers, and washers.
- Coat exposed threads with Loctite or anti-seize.
- Torque each nut in a star pattern according to the torque chart above.
First of all, if you're doing all the stuff in this article and you're still breaking studs or having a stud-loosening problem, you mights need to upgrade to stronger knuckle studs. Properly torqued studs hold up well, but loose and broken studs are definitely an issue on all solid axle Toys. These issues can be solved with stronger studs, bigger studs, or more studs.
Toyota Knuckle Studs and Nuts Torque Values
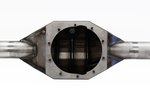
There are currently four available studs for Toyota knuckles.
All of these studs take different torque values which you'll see in the below chart. There are two thread sections on the stud that we're interested in here:
Stud to Knuckle
We used to recommend up to 45 ft-lbs of torque and some manufacturers still
have that recommendation. However, the stud holes in the knuckle are
through-holes and the stud has no bolt head to crank against the
knuckle. This means that the stud will not bottom out in the hole until the
unthreaded part of the stud contacts the knuckle surface. Too much torque could damage the knuckle or stud threads.
Therefore, to prevent damage to your knuckle studs or to the threads in the Toyota knuckle, we recommend double-nutting the stud and simply snugging it down. You don't even need a torque wrench for this part, but most people should use high strength thread locker on the threads. This snugging + Loctite combo goes for all studs, whether they're Trail-Gear studs, FROR studs, or the Toyota factory studs.
Nut to Stud
Not everyone can agree on torques: for the nut-to-stud torque with stock studs and nuts, Marlin
recommends 71 ft-lbs; the Toyota Gregory manual recommends 79 ft-lbs. Also, nuts can be torqued more with ARP studs since they are hardened. You'll notice that the FROR knuckle studs can be torqued the most due to their matching hardened nuts.
| Location/Stud Type | Foot-pounds | Newton-meters |
|---|---|---|
| Any stud into knuckle | Snug or 20 ft-lb | Snug or 28 N-m |
| Nut to stock Toyota stud | 71-80 ft-lb | 97-109 N-m |
| Nut to Trail-Gear Super Metal Stud | 75-80 ft-lbs | 102-109 N-m |
| Nut to Trail-Gear ARP Magnum knuckle stud | 80-100 ft-lb | 109-136 N-m |
| Nut to Front Range Off Road ARP knuckle stud | 110-120 ft-lb | 149-163 N-m |
How to Install Stock or ARP Toyota Knuckle Studs
Check the torque regularly. Fourwheeling equals loosening. Loosening equals breaking. Retorque your studs before every serious wheeling trip or on some regular basis.
Should you use Loctite or antiseize?
For the stud-to-knuckle threads we recommend using high strength red Loctite. For the majority of wheelers that are on moderate to hardcore trails, this will be sufficient to keep your studs in place. If you break studs on a regular basis and you're already doing all the regular maintenance, you might want to put your studs in dry so you can replace them more easily on the trail.
For the stud-to-knuckle threads, there are some things to think about. Here are your options:
Here’s how to install your studs so that they’ll be tighter longer:
If you prefer stronger studs with less maintenance, then you should look at upgrading your knuckle studs.
How to Maintain Toyota Steering Arm Studs
This is extremely important, whether you are using stock steering
arms and knuckles, or upgraded arms, studs, and knuckles. You MUST
check the torque of the nuts that hold on your steering arms
frequently. Some Toyota wheelers check
the torque before every trail run; some do it at every oil change. The
point is that it should become a part of your regular maintenance on
your trail rig. Loose nuts will result in sheared steering studs.
It’s pretty easy to do this: Set your torque wrench to the specified torque, and hit the four (or six) steering arm nuts on each knuckle. It doesn’t hurt to check the lower bearing caps as well. If this isn’t a part of your regular maintenance, you may be surprised to get 1/8 or a 1/4 turn out of some of your nuts.
Last updated: September 5, 2019