How To Take the Top Off Your Toyota 4Runner

To take the top off you need:
- a 12mm socket and ratchet
- a screwdriver
- a way to lift the top off
If no one will help you and you have no hoist, we recommend buying a hoist or building one. The top is heavy and awkward enough that most people won't be able to muscle it off without damaging themselves and/or the top.
Disconnecting the Top
Start by opening the back window all the way. Once it is fully in the tailgate, you shouldn’t plan to roll it up again until your hardtop is back on.
There are 2 trim panels on each side that are held on with a total of
16 screws. These panels cover the bolts that hold your top down.
Remove the trim panel screws and pull the panels off. We have no
pictures of the trim panels because we’ve never had a top that still had
the trim pieces.
Disconnect Electrical and Washer Hose
Disconnect the windshield washer hose and wiring from the rear driver side corner. You can tuck both into the body panel and cover them up.
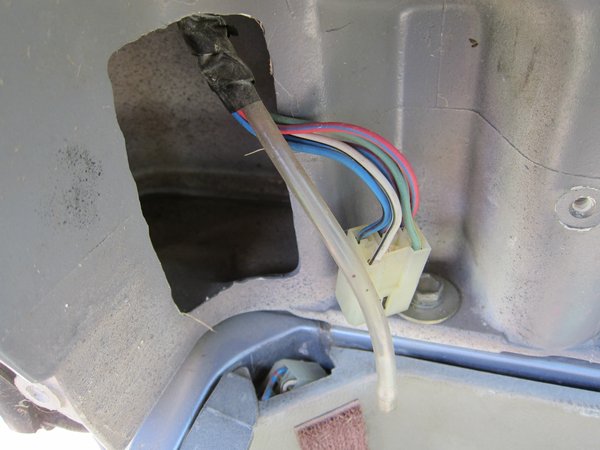
These are the only wiring/hoses that need to be disconnected.
Remove 14 Bolts
There are 14 bolts you must remove and 2 locating bolts you may want to remove. They have a 12mm hex head and are 8mmx1.25M thread. If you need to replace a bolt or two, you can use 30-40mm long bolts. Make sure to use a wide washer to distribute the load on the fiberglass of the hardtop.
There are 6 rear-facing bolts on the cab of the truck and 4 down each side of the body. Remove them all.
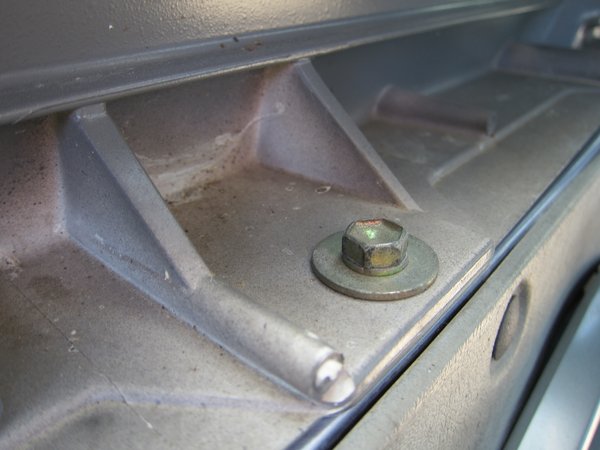
There are 4 of these bolts per side.
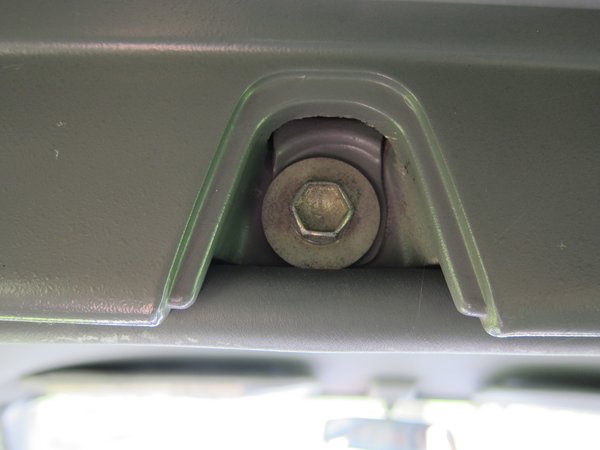
There are six of these bolts that hold the top to the back edge of the cab,
Remove or Leave Locating Bolts
The locating bolts don’t actually hold the top on. They do help to index it when you put the top on so that it ends up in the correct place. We recommend taking them off since it makes it easier to slide the top around and it'll keep them from damaging the bottom edge of the top as you remove it.
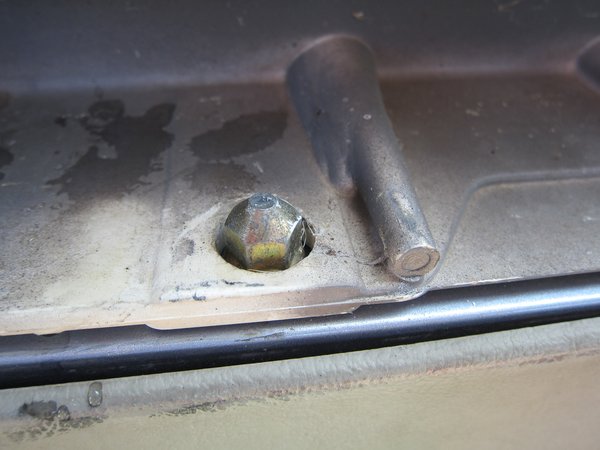
There are two of these - one on each side rail of the top.
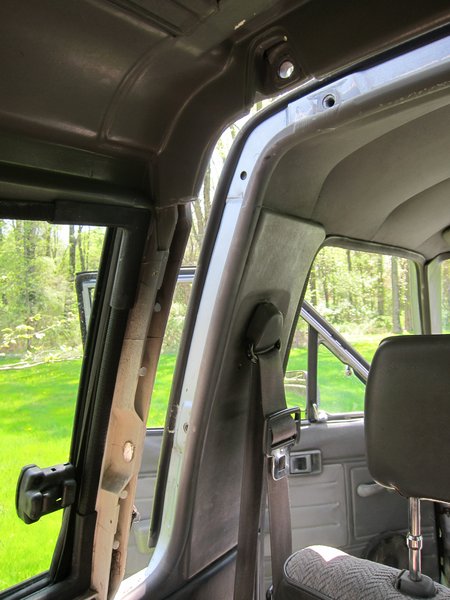
Side Note About the Third Bolt Back on the Driver Side...
When the 3rd bolt back on the driver side is installed, it tells the window that it is permitted to go up and down. It’s good to remove this bolt so that you won’t accidentally roll the rear window up. According to the manual, you may even damage the switch by installing the bolt without the top (we’ve never had this happen, though). However, you might be installing a soft top that requires the side rail bolts. To solve this you can either:
- shim the bolt up with washers so that it only engages the threads in the body
- not worry about it
If you have dogs, kids, or are a little klutzy, we recommend you shim the bolt up. Otherwise the window can rise out of your tailgate unsupported if someone holds the switch down and that can’t be a good thing.
Make It Free
If you’ve removed the locator bolts, you can slide the top backwards a couple of inches. You might want to carefully do this to make sure that no gaskets are stuck rather than pulling the top off in one motion.
If you move the top back like this to break any seal, remove the locator bolts.
Lifting the Top Off
The top weighs around 150 lbs. Unbolted from your 4Runner it’s flexy, fragile, and can be a awkward to carry. Take great care when removing the top. When it’s secured to your truck, it’s safe, but the thin fiberglass edges can be easily damaged it they’re banged. We have one top that has several dings and breaks on the inside and outside edges where the previous owner(s) weren’t careful.
We’ll describe three methods of removing the top.
1) Use a helper and lift the top off.
The easiest way to do this without a hoist setup is with 1-3 more people. If you are strong, do not expect your helpers to be strong! It can be super helpful for your helpers if you slide some 2x4s under your top that they can grab onto. Make sure you have a location to set the top in advance. Protect your paint with some towels!
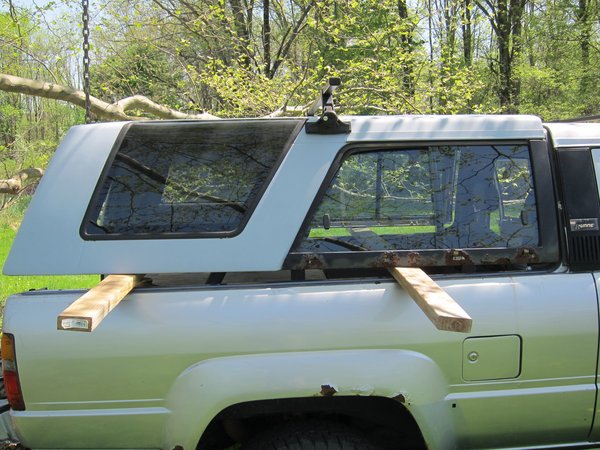
One or two 2x4s can really help if your helpers are "strength-challenged". Remember, the top is actually pretty heavy and awkward, so if you can get 4 people to lift at the corners, it's a lot easier.
2) Use a hoist.
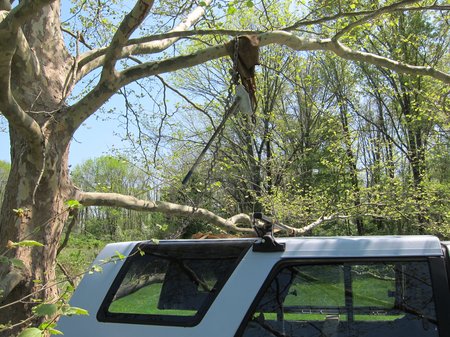
This will either go well or will be a disaster. A properly set up hoist will take a little time to set up to keep from damaging your 4Runner or your top. We usually use a high tree branch with a come-along. You should arrange your straps so that the top comes off level and balanced.
In the following pictures, you’ll see that we did not do that and we overcommitted a little bit, so the top came off at an angle. We hoped that the roof rack bar wouldn’t be too out of whack.
Normally, we’d attach to the 2x4s in the images. You might be tempted to wrap one strap around the front of the top and another around the back, but then you risk flexing the top as you raise it.

If you use a tree, protect the tree with a towel or welding jacket.
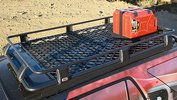
Using the roofrack here was a terrible idea - the top should come off level and balanced.
This is very important!
If you use a roof rack on your top, use metal artificial gutters.
They can be expensive, but the fiberglass rain gutters on your top are
not meant to support a great deal of weight and can break very easily.
Artificial gutters through-bolt into your top (you need to drill two
holes per side) and come with gaskets so they won’t leak.
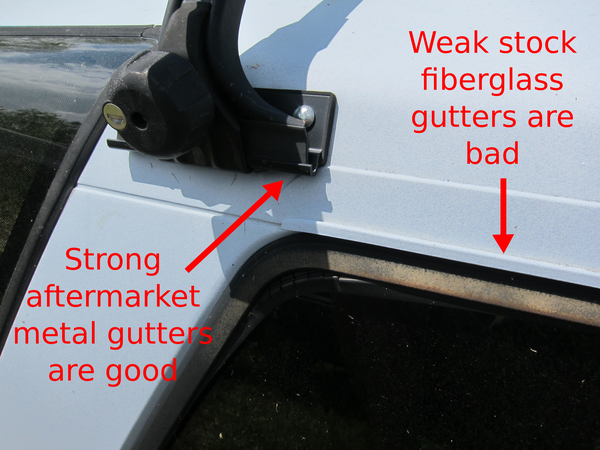
The stock rain gutters are good for rain, but not much else!
3) The Turtle Shell Lift (not recommended)
This is the hardest and most dangerous way to do this. We have done this when we were younger and dumber with FJ40 tops and once with a 4Runner top. Basically, you unbolt the top, get under it inside the 4Runner and stand up with it on your back. Once it’s lifted, you walk it off the truck. You need to have something to walk onto off of your tailgate, like a loading dock or other platform. We don’t like this method because it requires a lot of strength and balance, and it puts your spine in a bent compromising position. If you trip or stumble, you will damage your top and probably hurt yourself as well.
Installing the Top on Your Toyota 4Runner
Installation is pretty much the reverse of removal. The factory torques spec on the hardtop bolts is 10 ft/lbs. The manual calls for a specific tightening procedure. If you can use it, that’s great! But your top may be a little off. We usually try to start at the front and work to the back where the top has a little more flexibility to move. Don’t tighten any bolts fully until they are all at least threaded into the body. Bolt “B” is the switch that permits the rear window to operate.
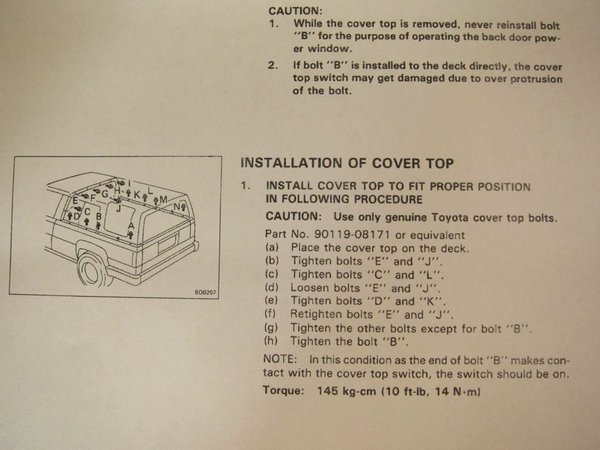
These are the factory bolt order tightening instructions.
Last updated: June 3, 2019